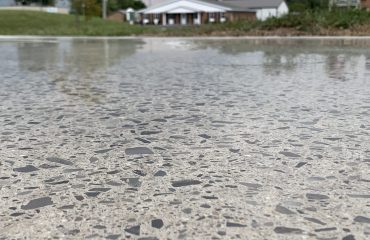

A polished concrete floor is only as good as the slab underneath it. The grinding and polishing steps matter, but the result is mostly decided earlier, by the mix design, the finishing, the cure and how the floor is protected during construction. When a contractor can influence those items, the finished floor comes out far better than when only the polishing method is specified.
Start with the finished look
When an architect or owner specifies a polished floor, the first step is to decide what it should look like. Settle the level of aggregate exposure, how clear the reflection should be and any decorative work such as color, saw cuts, engraving or seeded aggregate.
Once the look is set, write the specification. For new concrete it usually sits in Division 3 (Concrete), which covers mix design, finishing, curing, control joints, protection and sometimes the polishing process. If the polishing process is not in Division 3, it is normally in Division 9 (Finishes). The points below are worth including in any polished concrete specification.
Mix design
Mixes vary by region because of local aggregates and weather, but these guidelines hold almost everywhere:
- Avoid air entrainment. If it is required, keep it at 3% or less.
- Keep fly ash low, no more than 20% of the cement weight.
- Do not use calcium chloride accelerators.
- Specify 3,500 to 5,000 psi at 28 days.
- If the aggregate will be exposed, check how it looks once polished and how well it holds a polish compared with the cream surface.
- Look at the color of the cured mix. It is the final color if the floor is not stained, and it changes the color of any stain applied over it.
Finishing
- A floor flatness (FF) number above 40 keeps the finished floor from looking wavy.
- Power trowel the surface right up to the point before burnishing, and do not let the trowel run dry.
- Where the slab is hand troweled, make sure it is well consolidated and troweled as tight as possible.
- If a cream finish with little or no exposed aggregate is specified, thorough floating and compaction bring more cream to the surface.
Curing
Hardeners and densifiers react with calcium hydroxide in the slab to form more calcium silicate hydrate (CSH), the material that binds the cement paste to the aggregate. That reaction only works if the product can get into the surface, so the cure matters.
- If a curing compound is required, use one that is water based and breaks down under UV light, so the densifier and any stain can still penetrate.
- A cream finish is not possible if a cure-and-seal product or a tilt-up form release agent has to be ground off.
- Wet cure where you can. It reduces curling at edges and joints. Curled edges get ground harder and show more aggregate than the rest of the floor.
- Let the concrete cure at least 28 days before grinding.
Control joint placement
Where possible, keep control joints out of the middle of hallways and other highly visible areas.
Grinding and polishing
- Once grinding starts, never skip a grit in the sequence.
- When switching from metal-bond tooling to resin, step back one grit from the last metal grit used.
- Work each grit until it has fully removed the scratch pattern from the one before it, then move to the next finer grit.
- Let the slab decide when the densifier goes down, but apply it no later than the 200-grit resin step unless the architect approves otherwise.
- Grind and polish edges to match the rest of the floor.
Protecting the finished floor
- Put drip diapers on all equipment.
- Keep vehicles and lifts off the floor whenever possible.
- Keep acids away from the surface.
- Do not set anything on the floor that could stain, etch or scratch it.
Get the process right the first time
The Scientific Polishing system covers every step above, from slab evaluation to final protection, and our hands-on training teaches crews to run it on real floors. For grinders built for this work, see Warrior Equipment, or call us at 877-743-9732 to talk through your next project.